Python 11 - GUI

Graphical User Interface
In Python, you don’t have just to use a text display; you can create a GUI (Graphical User Interface) to make programs that look professional.
This page demonstrates the basic features of Python’s built-in GUI named tkinter.
You can add images, labels, buttons and data entry boxes to develop interactive programs.
Hyperlinked sections covered on this page:
Setup: Title, Size & Background
Firstly, import the tkinter command and set tkinter.Tk() to a variable such as window.
GUI code can be quite complicated with multiple elements so it is sensible to use a comment for each section.
Setting the title, size and background colour of your window is optional but can be easily set up at the start of your code.
The .geometry() command sets the size of the window. The first number is the width, and the second number is the height.
The .configure() command can be used to set the background colour. For a full list of compatible colours, check here.
import tkinter
#Setting up the Window
window = tkinter.Tk()
window.title("Graphical User Interface")
window.geometry("400x400")
window.configure(background = "lightblue")

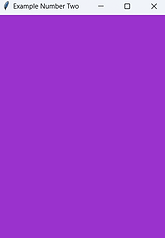
import tkinter
#Setting up the Window
window = tkinter.Tk()
window.title("Example Number Two")
window.geometry("300x400")
window.configure(background = "darkorchid3")
Creating Elements: Labels, Entry Boxes, Buttons, Radio Buttons, Images, Message Boxes
Labels
label1 = tkinter.Label(window, text = "Hello there")
label1 = tkinter.Label(window, text = "Hello there", fg = "black", bg = "lightblue", font = ("Arial", 12))

Simple label with default formatting:

Label with custom formatting:
No elements will appear in your window until you write code to put them there. See the 'Displaying Elements' section further down.
Entry (Text) Boxes
Simple entry box with default formatting:
entry1 = tkinter.Entry(window)
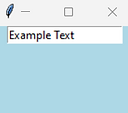
Entry boxes will appear blank, the 'Example Text' shown in the images has been typed in.
Entry box with custom formatting:
entry1 = tkinter.Entry(window, fg = "blue", bg = "gray90", width = 12, font = ("Arial",12))

Buttons
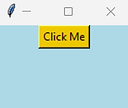
The command property of a button is a subroutine that will be called when the button is pressed.
The subroutine must be written above the button creation code.
def ButtonPress():
#Code here runs when the button is pressed
button1 = tkinter.Button(window, text = "Click Me", fg = "black", bg = "gold2", command = ButtonPress)
Radio Buttons
The Radiobutton element is a multiple-choice option button.
A variable needs to be created to track which option has been selected, in this example it is ‘choice’. Each radio button needs to be linked to the variable and given a unique value (e.g. 0, 1, 2).
The radio button with the the value of 0 will be automatically selected when the window opens. Although not shown below, the .set() command can also be used to select a specific radio button, e.g. choice.set(2).
choice = tkinter.IntVar()
radio1 = tkinter.Radiobutton(window, text = "Breakfast", variable = choice, value = 0)
radio2 = tkinter.Radiobutton(window, text = "Lunch", variable = choice, value = 1)
radio3 = tkinter.Radiobutton(window, text = "Dinner", variable = choice, value = 2)

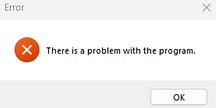
Message Boxes
You need to import messagebox from tkinter before you can use message boxes. You only need to do this once in your program and it sensible to have it at the very start after you import tkinter (and any other libraries).
from tkinter import messagebox
tkinter.messagebox.showinfo("Information", "Welcome to the program!")

tkinter.messagebox.showerror("Error", "There is a problem with the program.")
if (tkinter.messagebox.askyesno("Warning", "Have you understood the instructions?")) == True:
tkinter.messagebox.showinfo("Warning", "Thank you for understanding.")
else:
tkinter.messagebox.showinfo("Warning", "Please read the instructions again.")
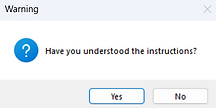
Yes / No Message Box

Clicking Yes (True)

Clicking No (False)
Images
Tkinter supports the image file types .png and .gif.
The image file must be saved in the same folder that the .py file is.
Resize the image in separate image editing software such as Paint to a specific size.
Tkinter does not support all image file types, such as .jpg. Use an application like Microsoft Paint to save an image with a different extension like .png.
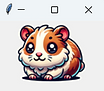
photo1 = tkinter.PhotoImage(file = "hamster.png")
photoLabel1 = tkinter.Label(window, image = photo1)
An image can be turned into a clickable button rather than a label.
def ButtonPress():
#Code here runs when the button is pressed
photo1 = tkinter.PhotoImage(file = "hamster.png")
button1 = tkinter.Button(window, image = photo1, command = ButtonPress)
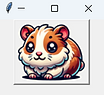
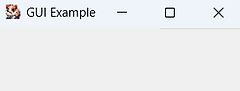
photo1 = tkinter.PhotoImage(file = "hamster.png")
window.iconphoto(True, photo1)
The icon of the window can be changed to an image.
Displaying Elements: Pack, Place and Grid
Pack
.pack() puts the element in the centre of the window, with the next packed element immediately below.
window.mainloop() should always be your last line of code in every program, after you have packed, placed or gridded your elements.
labelAdd.pack()
buttonAdd.pack()
labelMinus.pack()
buttonMinus.pack()
window.mainloop()

Place
The .place() command allows an element to be placed in specific coordinates, using x (horizontal) and y (vertical) axes.
labelAdd.place(x = 25, y = 15)
buttonAdd.place(x = 12, y = 35)
labelMinus.place(x = 90, y = 15)
buttonMinus.place(x = 83, y = 35)
window.mainloop()
Grid
The .grid() command is used to create a grid system to set the row and column. Remember Python starts counting at 0.
You can use padx and pady to add extra space (x is horizontal, y is vertical).
labelAdd.grid(row = 0, column = 0, padx = 10, pady = 5)
buttonAdd.grid(row = 1, column = 0, padx = 10)
labelMinus.grid(row = 0, column = 1, padx = 10, pady = 5)
buttonMinus.grid(row = 1, column = 1, padx = 10)
window.mainloop()
Inputs and Outputs
.config to Change an Element
.config() overwrites the property of an element. It can be used with elements such as labels and buttons to change how they appear.
label1.config(text = "Warning!")
The example below (not showing setup and packing) adds 1 to a total variable when the button is pressed. Config is used in two ways: to display the updated total and to change the background of the label to green.
def AddOne():
global total
total = total + 1
labelTotal.config(text = total, bg = "green")
total = 0
buttonAdd = tkinter.Button(window, text = "Add", command = AddOne)

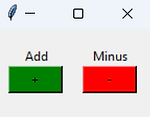
Below is a similar program in full that increases or decreases and displays a total when the buttons are pressed.
#Setup
import tkinter
window = tkinter.Tk()
total = 0
#Button Presses
def AddOne():
global total
total = total + 1
labelTotal.config(text = total)
def MinusOne():
global total
total = total - 1
labelTotal.config(text = total)
#Create Elements
labelTotal = tkinter.Label(window, text = total, font = ("Arial",14))
buttonAdd = tkinter.Button(window, text = "+", width = 6, bg = "green", command = AddOne)
buttonMinus = tkinter.Button(window, text = "-", width = 6, bg = "red", command = MinusOne)
#Display Elements
buttonAdd.pack()
buttonMinus.pack()
labelTotal.pack()
window.mainloop()

.get to Input a Value
.get() returns the value of an element such as an entry box, label or the choice variable if using radio buttons.
The value of the element should be stored in a variable so it can be used elsewhere, for example:
name = entryName.get()
number = int(entryNumber.get())
Use int when getting a value that is an integer:
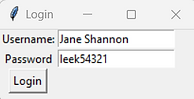
The full program example below checks that the values typed into the username and password entry boxes are correct.
#Setup
import tkinter
from tkinter import messagebox
window = tkinter.Tk()
window.title("Login")
#Button Presses
def CheckDetails():
username = entryUsername.get()
password = entryPassword.get()
if username == "Bob Bobson" and password == "cabbage123":
tkinter.messagebox.showinfo("Success","Welcome " + username)
else:
tkinter.messagebox.showerror("Invalid","Those details are incorrect.")
#Create Elements
labelUsername = tkinter.Label(window, text = "Username:")
labelPassword = tkinter.Label(window, text = "Password")
entryUsername = tkinter.Entry(window)
entryPassword = tkinter.Entry(window)
buttonLogin = tkinter.Button(window, text = "Login", command = CheckDetails)
#Display Elements
labelUsername.grid(row = 0, column = 0)
entryUsername.grid(row = 0, column = 1)
labelPassword.grid(row = 1, column = 0)
entryPassword.grid(row = 1, column = 1)
buttonLogin.grid(row = 2, column = 0)
window.mainloop()


.bind for Key Presses (& Close Window)
.get() will run a specific function when a certain key is pressed.
The name of the key must be surrounded by < > brackets and speechmarks. Any associated subroutine of a key bind will need a parameter: event has been chosen and set to None.
The code below closes the window using the .destroy() command when the Esc key is pressed.
def Close(event = None):
window.destroy()
window.bind("<Escape>", Close)
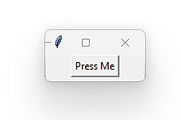
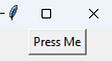
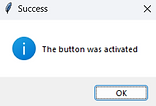
The code below will activate the button (and display a message box) by clicking on it but also by pressing the Enter (Return) key.
def ButtonPress(event = None):
tkinter.messagebox.showinfo("Success","The button was activated")
button1 = tkinter.Button(window, text = "Press Me", command = ButtonPress)
window.bind("<Return>", ButtonPress)
GUI Programs to Make
Making a program using a GUI can be overwhelming and you must decompose the problem - take it step by step:
-
Import tkinter and create the window (set the title, size and background colour).
-
Create the elements you will need such as labels, buttons and entry boxes.
-
Put the components in the window using pack, place or grid.
-
Write the subroutines for any button presses. These are written at the top of the program after the window setup.
-
Consider your variables - do any need to be set at the start? Have you made them global if they’re needed within a subroutine?
-
Put window.mainloop() as the final line of code, only have it once.
Use #comments in your code to break up the different sections, the key four sections are shown below.
#Setup
#Button Presses
#Create Elements
#Display Elements
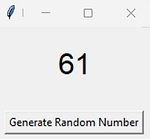
GUI Task 1 (Random Number Generator)
Generate a random number between 1 and 100 when the button is pressed and display it in a label.
Extension idea: Use entry boxes to allow the user to manually input the minimum and maximum value.
Example solution:
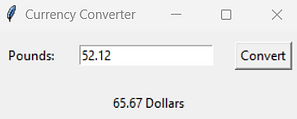
GUI Task 2 (Currency Exchange)
Enter a decimal value and convert it from British pounds to American dollars. You can search for the current exchange rate.
Extension idea: Show the conversion rate for other currencies such as Euros and Japanese Yen.
Example solution:
GUI Task 3 (Random Quote Generator)
Create a list of quotes and use the choice command from the random library to select one to be displayed in a label when the button is clicked.
Extension idea: Have a separate text box and button to add more quotes to the list.
Example solution:

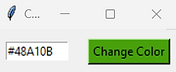
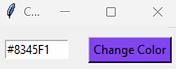
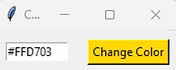
GUI Task 4 (Colour Changer)
When the button is clicked change the background colour of the button with .config to the RGB colour code in the entry box. This should be # followed by 6 hexadecimal values (0-9, A-F).
Extension idea: Have an error pop up in a message box if the colour code is incorrect - it must be exactly 7 characters long and start with a hashtag.
Example solutions:

GUI Task 5 (Class Captain Votes)
Use radio buttons to vote for different candidates in a class vote.
Use an if statement when the button is pressed to check which radio button is selected using .get() and the variable you've assigned to the radio buttons ('choice' if you've followed the code in the radio buttons section on this page).
Use .config to overwrite a label's value. Remember any variables you want to use in subroutines must be globalised.
Extension idea: Stop the count after a certain number - e.g. 30 votes recorded.
Example solution:
